
Crudite Recipe: How To Cut For A Perfect Platter
T of C
Table of Contents
Crudite Recipe: How To Cut For A Perfect Platter
Introduction
Did you know that a beautifully presented crudite platter can increase vegetable consumption by up to 35% at a gathering? It’s a fact backed by food psychology studies, yet so many of us settle for a haphazard pile of carrot sticks next to a bowl of dip. The common belief is that a vegetable platter is just a simple, throw-together appetizer, but the truth is, mastering the art of the crudite arrangement is what separates a forgettable snack from the stunning centerpiece of your party spread. A perfect platter isn’t about fancy ingredients; it’s about precision, color, texture, and most importantly, how you cut your vegetables. In this comprehensive guide, we’ll transform your approach, providing you with the knife skills, organizational secrets, and presentation tricks used by culinary professionals to create a flawless crudite display that will captivate your guests before they even take a bite.
Ingredients List
The beauty of a crudite recipe lies in its flexibility. Use this list as a blueprint, and feel free to swap based on seasonality and color. Aim for a rainbow on your platter!
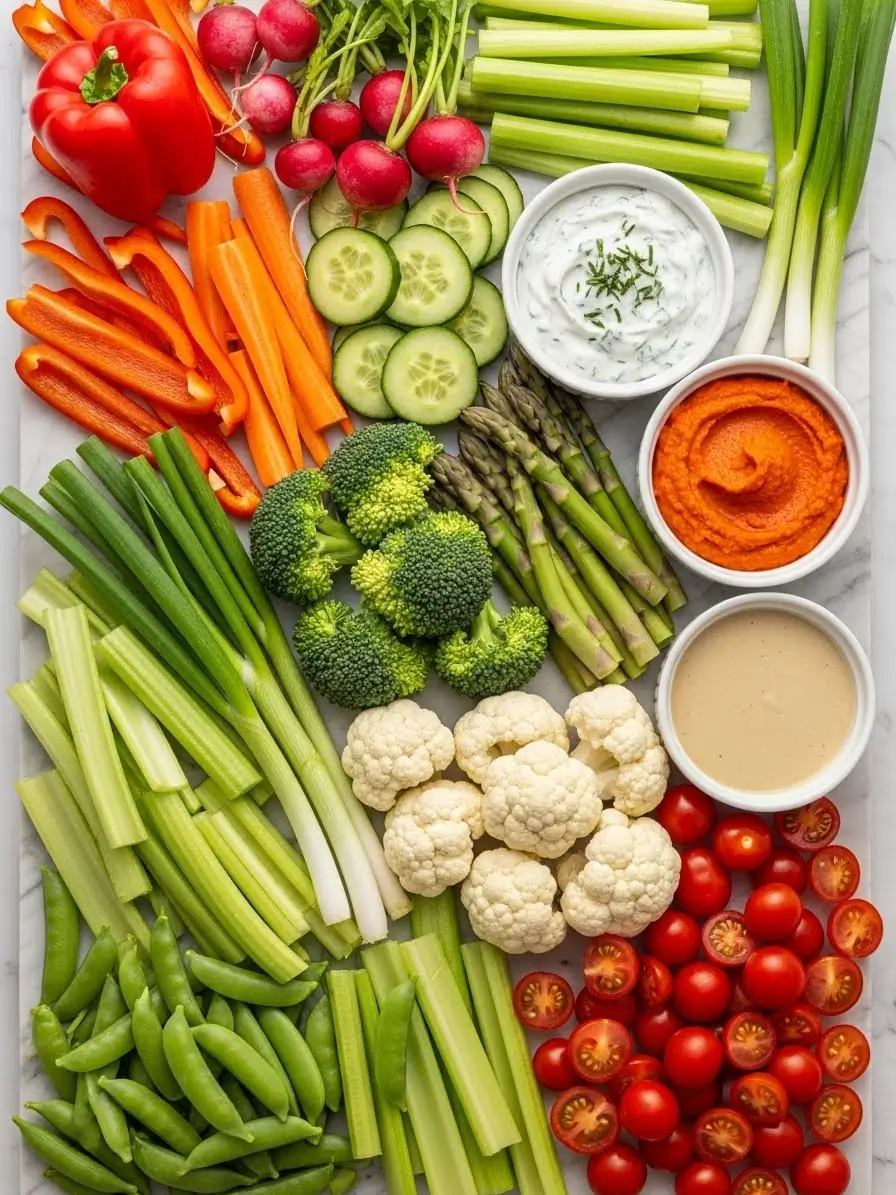
The Vegetable Foundation (Choose 8-10 varieties for visual impact):
- Crunchy Reds & Oranges: 2 large red bell peppers, 1 bunch of radishes, 3-4 medium carrots.
- Vibrant Greens: 1 head of broccoli, 1 English cucumber, 1 bunch of crisp asparagus (blanched), 2-3 stalks of celery.
- Purples & Whites: 1 small head of cauliflower, 1 cup of sugar snap peas, 1 pint of cherry tomatoes.
- Aromatic Alliums: 2-3 green onions (for a sharp, elegant garnish).
For the Dips (Choose 2-3 for variety):
- Classic Creamy Herb Dip: 1 cup full-fat Greek yogurt or sour cream, mixed with fresh dill, chives, lemon zest, salt, and pepper.
- Roasted Red Pepper Hummus: Store-bought or homemade for a sweet, smoky flavor.
- Zesty Lemon-Tahini: A dairy-free, creamy option with a tangy kick.
- Substitution Tip: For a lighter platter, swap creamy dips with a high-quality extra virgin olive oil sprinkled with flaky sea salt and cracked black pepper, or a reduced-fat Greek yogurt base.
Timing
Let’s debunk the myth that a great platter takes forever. With the right strategy, you can build a masterpiece efficiently.
- Prep Time: 45 minutes. This includes washing, cutting, and arranging. With practice, you can get this down to 30!
- Assembly Time: 15 minutes.
- Total Time: 60 minutes. Compared to the average home cook’s rushed 20-minute platter, investing this hour ensures a result that looks 200% more professional and appetizing.
Best Tools For Best Snack From Amazon:
Your Step-by-Step Guide to a Masterful Crudite Platter
Step 1: The Strategic Wash & Dry
Begin by thoroughly washing all your vegetables under cold running water. This is your non-negotiable foundation. For leafy herbs or vegetables with crevices like broccoli, a quick soak in a water-vinegar bath (3:1 ratio) can ensure extra cleanliness. The critical trick here is to dry everything completely. Use a salad spinner for greens and herbs, and pat down firmer veggies with a clean kitchen towel. Water is the enemy of crispness and dip adhesion!
Step 2: Mastering the Cut (Shape & Function)
This is where the magic happens. Consistent cuts are not just about aesthetics; they ensure even dipping and a pleasurable eating experience.
- Carrots & Cucumbers: Use a crinkle-cut knife for a fun, professional look that holds more dip, or create long, elegant batons (julienne) for a modern feel.
- Bell Peppers: Slice off the four sides to get flat “planks,” then slice those into perfect, dip-friendly strips. This avoids the curved, awkward pieces with ribs.
- Broccoli & Cauliflower: Cut the florets from the stem, aiming for uniform, bite-sized pieces. Don’t discard the stem! Peel it and slice it into crisp coins—a delicious and zero-waste surprise.
- Radishes: For a stunning effect, use a paring knife to make a small “x” on the top and bottom, then gently press to create a blooming radish flower.
Step 3: The Art of the Blanch (For Enhanced Color & Texture)
Some vegetables benefit immensely from a quick blanching. This 90-second process locks in vibrant color and slightly softens texture without losing crunch.
- Asparagus: Trim ends, blanch in boiling salted water for 60-90 seconds, then immediately plunge into ice water. They’ll turn a brilliant green.
- Green Beans & Sugar Snap Peas: Follow the same method for 45-60 seconds. The color becomes electric.
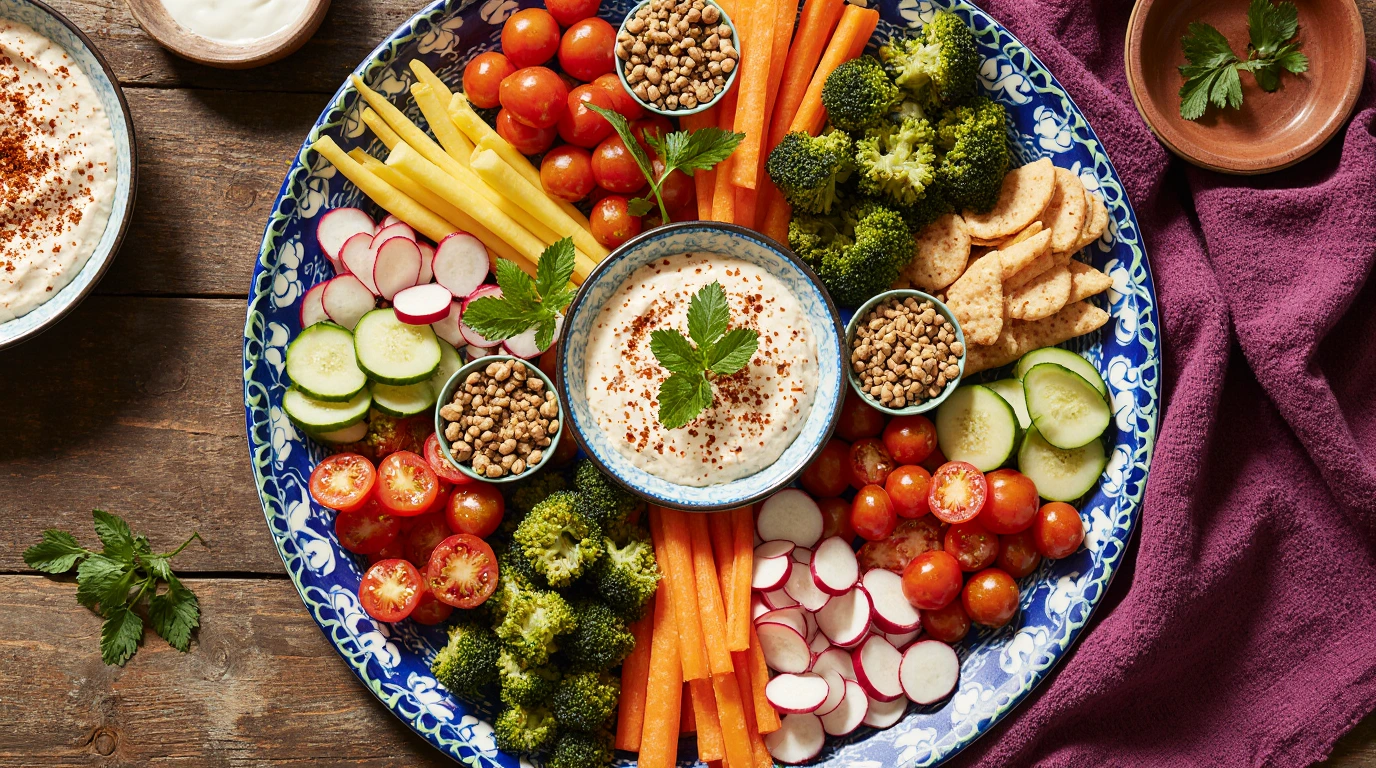
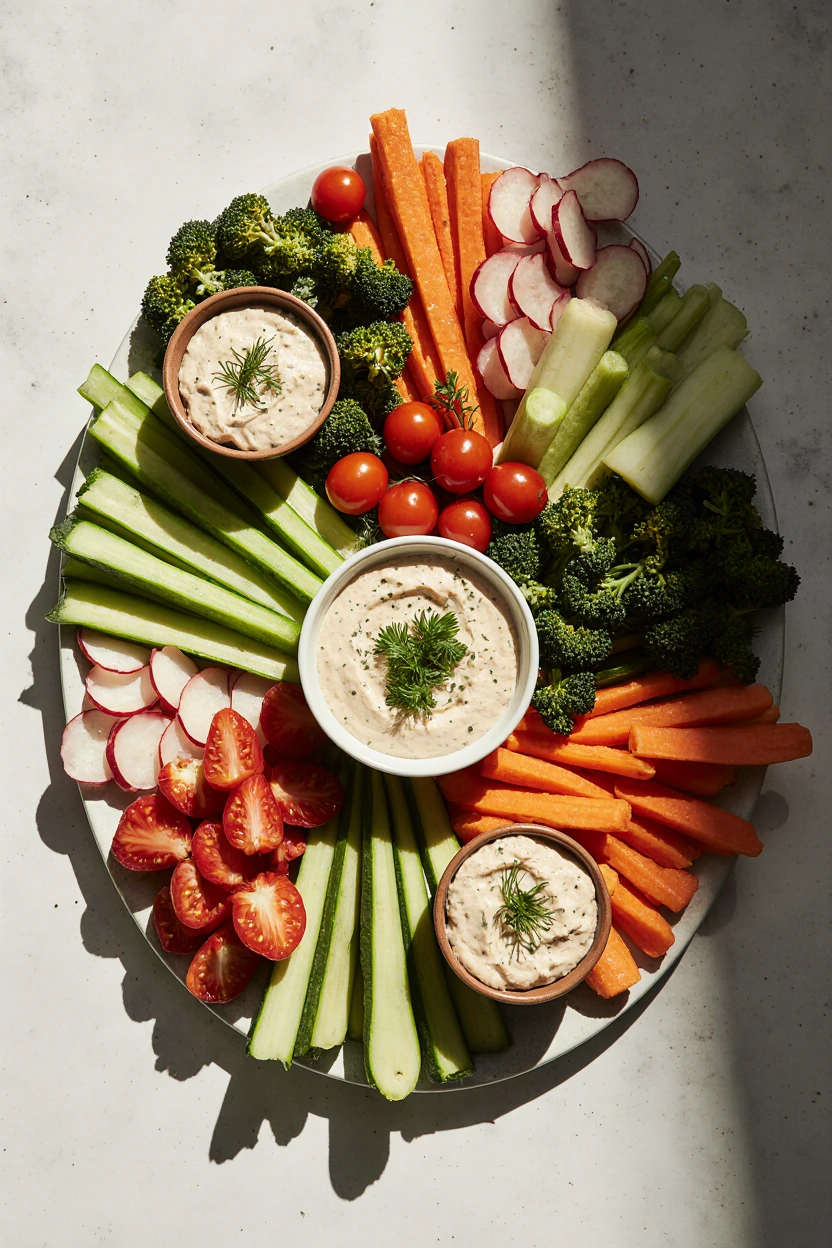
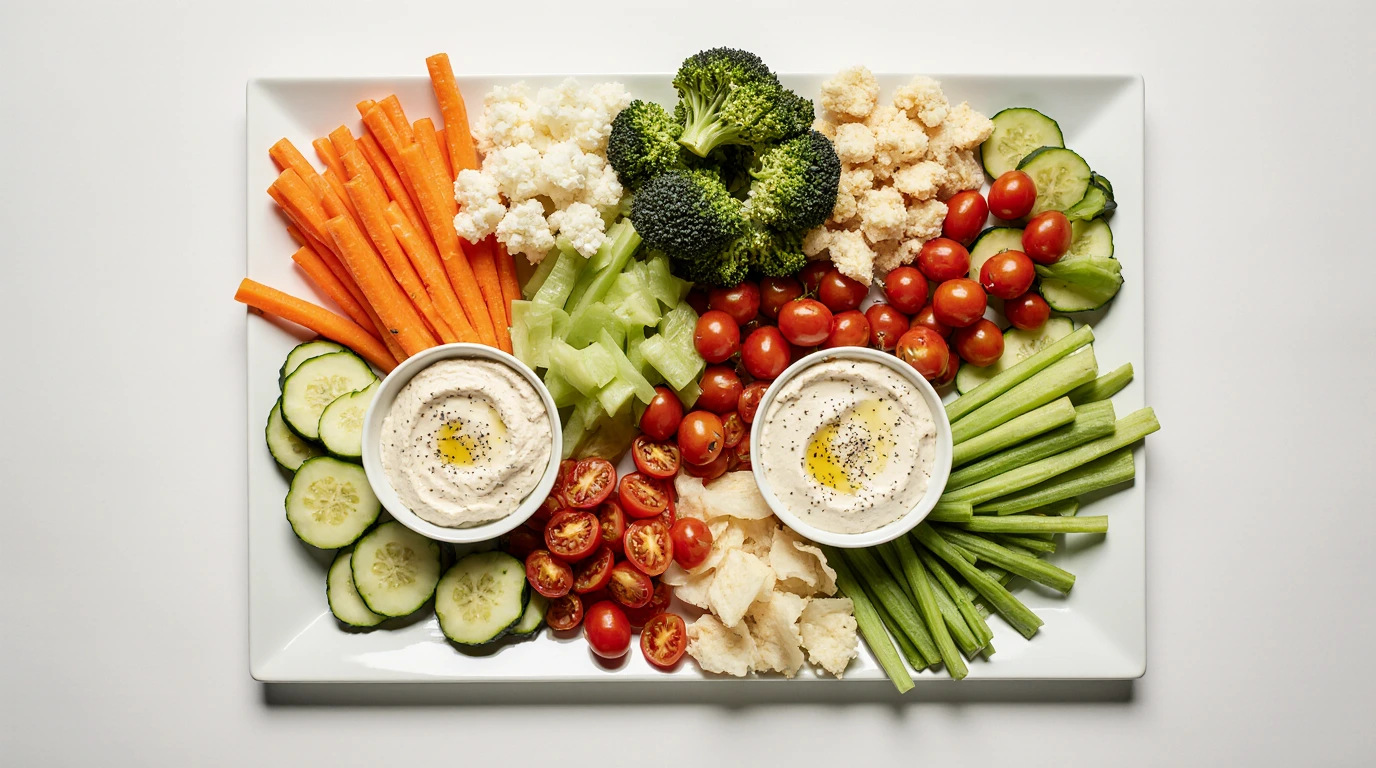
Step 4: Strategic Arrangement & Flow
Now for the canvas. Use a large wooden board, slate, or a series of decorative plates. Start by placing your small dip bowls in 2-3 different spots to create visual anchors and prevent traffic jams. Then, build outwards.
- Group by Color: Create blocks or rivers of color (all the greens together, all the reds together) for high visual impact.
- Vary Height & Direction: Lay some vegetables flat, stand others up (like celery sticks in a glass), and pile some in little mounds. This creates dynamic energy.
- Garnish Thoughtfully: Scatter the green onion slices, fresh dill, or edible flowers last for a final touch of freshness.
Nutritional Information
A well-crafted crudite platter is a powerhouse of nutrition. Per average serving (approx. 1.5 cups of assorted vegetables with 2 tbsp of Greek yogurt dip):
- Calories: ~80-110
- Total Fat: 2-4g (primarily from healthy dips)
- Carbohydrates: 12-15g
- Dietary Fiber: 4-6g (contributing to over 20% of the daily recommended intake)
- Protein: 3-5g
- Key Vitamins & Minerals: High in Vitamin A (from carrots, peppers), Vitamin C (from peppers, broccoli), Vitamin K, and potassium.
Healthier Alternatives for the Recipe
Making this platter fit your dietary goals is simple.
- For a Low-Carb/Keto Focus: Emphasize non-starchy vegetables like celery, cucumbers, bell peppers, radishes, broccoli, and cauliflower. Serve with a dip based on avocado, full-fat sour cream, or ranch.
- For a Vegan Platter: Ensure all dips are plant-based. Opt for hummus, baba ganoush, a black bean dip, or a cashew-based “creamy” dressing.
- To Boost Protein: Include edamame pods (blanched) on the platter and focus on high-protein dips like a white bean and rosemary spread or a lentil dip.
- Reducing Sodium: Make your own dips to control salt levels and use plenty of herbs, citrus, and garlic for flavor without the sodium.
Serving Suggestions
Think beyond the appetizer table.
- The Centerpiece: Place your crudite platter in the middle of a grazing table, surrounded by cheeses, cured meats, and bread.
- Individual Portions: For a stylish dinner party starter, create small, individual crudite arrangements on salad plates for each guest.
- With a Main: Pair it with a hearty soup or frittata for a light, balanced lunch.
- The Dipping Bar: Set up a “DIY Dip Bar” with 4-5 small bowls of different dips and a large central platter of vegetables for interactive fun.
Common Mistakes to Avoid
- Soggy Vegetables: The #1 culprit is cutting veggies too far in advance and storing them wet. Always cut, dry thoroughly, and store in airtight containers with a paper towel to absorb moisture.
- Uniform Boredom: Cutting everything into identical rounds or sticks lacks visual interest. Mix up your shapes and sizes as outlined in Step 2.
- Ignoring the Dip-to-Veg Ratio: Nothing is sadder than running out of dip. A good rule is 1 cup of dip for every 4 cups of vegetables.
- Neglecting Accessibility: Arrange your platter so all items are easy to grab without dismantling the whole display. Avoid precarious piles.
Storing Tips for the Recipe
- Pre-Prep is Your Friend: You can wash, dry, and cut most vegetables 1-2 days ahead. Store them in separate airtight containers or zipper bags lined with a dry paper towel.
- Dips: Most homemade dips can be made 2-3 days in advance, often tasting better as flavors meld.
- Post-Party: If your platter has been out for less than 2 hours, carefully deconstruct it. Discard any items that were heavily handled. Store the remaining untouched vegetables and dips separately in the fridge. The vegetables will last 2-3 more days, though they may lose some crispness.
Conclusion
Mastering the perfect crudite platter is about intentional cuts, vibrant color grouping, and strategic prep. By focusing on texture, dry vegetables, and dynamic arrangement, you transform simple ingredients into an edible work of art. It’s a skill that guarantees compliments and healthier eating at every event.
Ready to wow your next gathering? Try this method and share a photo of your beautiful creation in the comments below! We’d love to see your colorful masterpieces. Don’t forget to subscribe for more simple, transformative guides to effortless entertaining.
FAQs
Q: Can I cut my vegetables the night before?
A: Absolutely! For best results, cut sturdier vegetables like carrots, bell peppers, and celery the night before. Store them separately in airtight containers with a paper towel. More delicate veggies like cucumbers and tomatoes are best cut the day of to prevent sogginess.
Q: What’s the best way to revive slightly wilted crudite vegetables?
A: Give them an ice bath! Submerge limp celery, carrots, or radishes in a bowl of ice water for 15-30 minutes. They’ll often regain a significant amount of their crisp snap.
Q: How do I keep my apple or pear slices from browning on a platter?
A: While not traditional, if you add them, toss the slices in a little lemon juice or a commercial anti-browning produce wash. For a purely vegetable platter, you can avoid this issue altogether.
Q: What are some unique vegetables I can use to make my platter stand out?
A: Think color and shape! Try purple cauliflower, yellow watermelon radishes, endive leaves (perfect scoopers!), jicama sticks, or blanched golden beets.
Try These Recipes Next !!
If you love cooking and are looking for more recipes, we have a selection you’ll enjoy.
Leave a Reply
There are no reviews yet. Be the first one to write one.